

Maybe you’ve never thought about it, or maybe you’ve thought about it too much…maybe your family doesn’t even dye eggs for Easter.
Let me ask you…do you know what the ingredients are in those nifty little dye tablets that are used to color Easter eggs? You know, the ones that fizz up all cool when you plop them into a cup of hot water and vinegar? Well let me break it down for those of you who may be curious. Those tablets contain sodium bicarbonate, maltodextrin, Yellow #5, Red #40, cellulose gum, Yellow #6, Blue #1, Red #3, Blue #2, and magnesium stearate.
I mean, I don’t think they left out a single artificial dye. Now besides the obvious reasons why this is a problem, let me tell you a little bit about how this affects dying eggs specifically.
Chicken egg shells contain approximately 7,000 pores. When a chicken lays the egg, it gets coated with something called a “bloom” that seals off the pores to outside contaminants. This is why fresh eggs are able to stay on your counter rather than the refrigerator. Before you cook or prepare a fresh egg however, it must be washed, and when it is, the bloom is washed away exposing those 7,000 pores. The eggs that you purchase from the store have already been washed (hence why they need to be refrigerated).
So now you have an egg, all pores open, that you are going to drop into a tiny colored cup with fizzy artificial dye tablets, and where do you think that dye will go? Directly to the egg. Have you ever noticed that when you peel a shell off a dyed egg, the egg is dyed too?
I try so hard to keep the artificial dyes out of my house and out of our food because of the damage they cause, so we have started dying our Easter eggs the natural way. Here is the step by step on how I do it. Let’s get into it…
First
All of my fresh chicken eggs get a bath to remove any gunk on the shells. Our eggs are never really dirty because we collect them several times a day. I also date them when they are collected so that I can keep track of how old they are.

Second
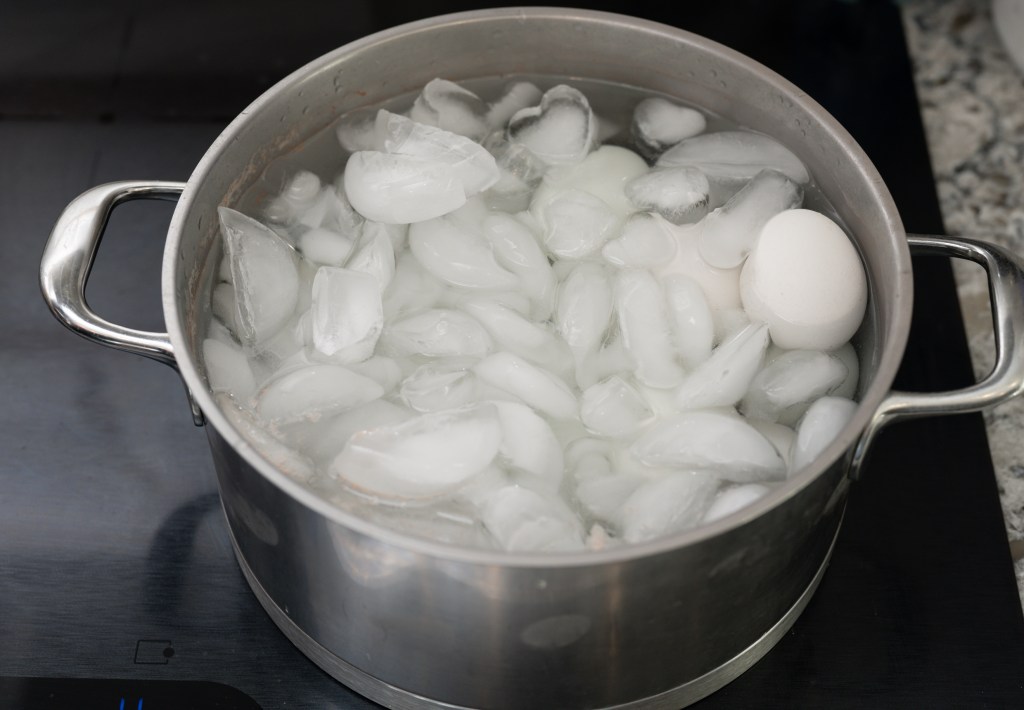
I coat the bottom of a large pot with salt prior to filling it with water. This makes the fresh eggs easier to peel. I don’t know how this works, but since I’ve started doing this, the shells just fall off when I peel the eggs. Then I fill the pot with water, lower the eggs in with a spoon and boil them for about 10 minutes. Immediately after I dump the boiling water out of the pot, I fill it with ice to cool the eggs.


Next
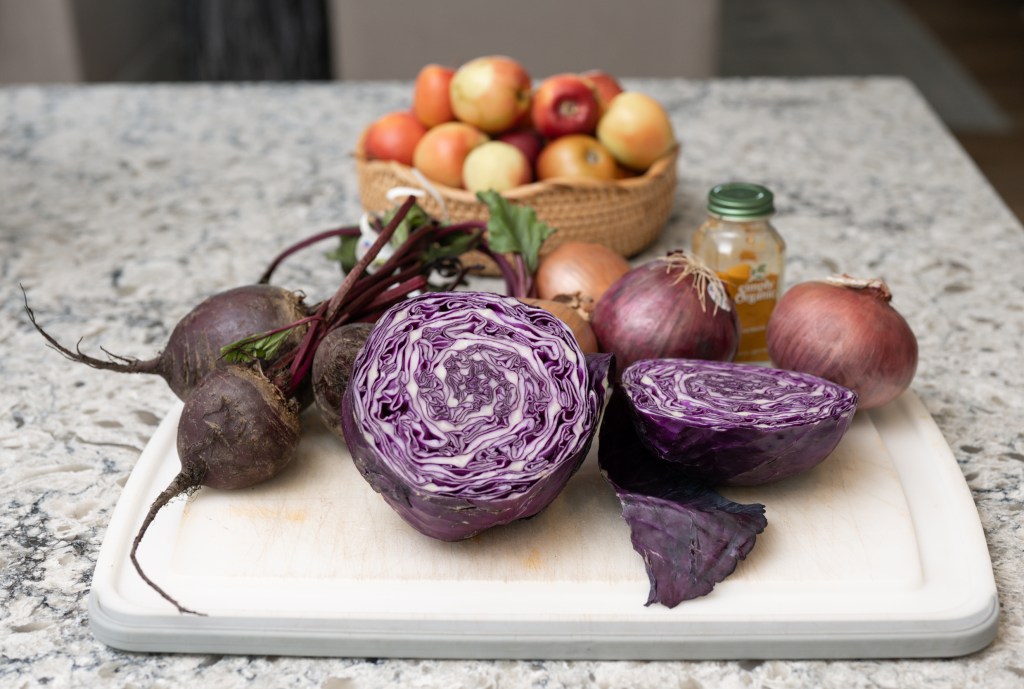
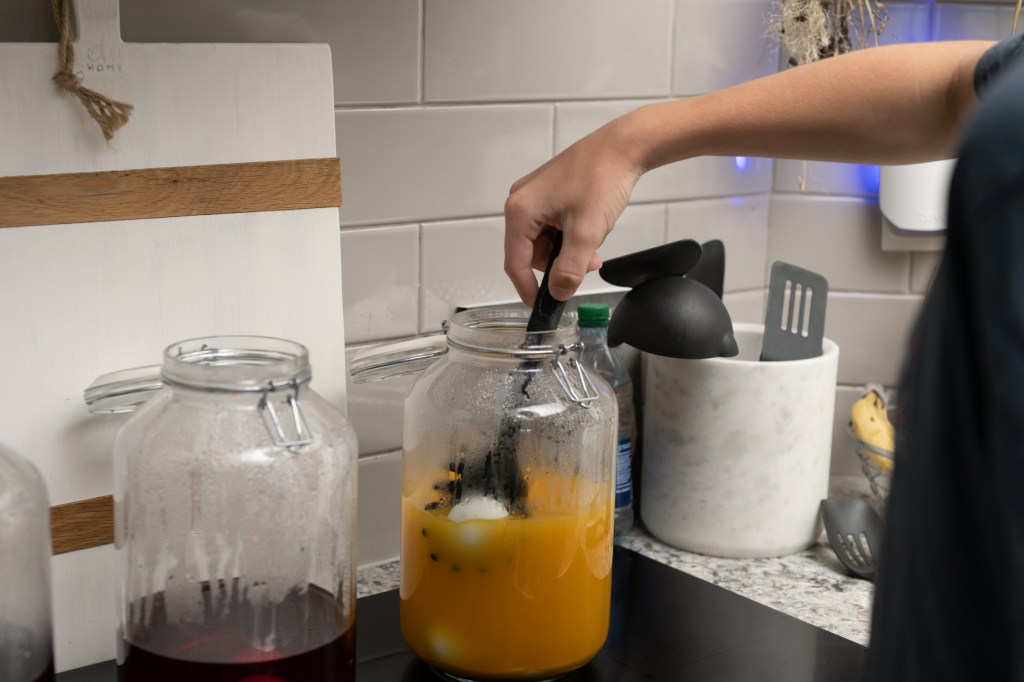
While the eggs are cooling in the ice bath, I start chopping all the foods I want to use for dyes. This year, I did beets, red cabbage, turmeric, and I was planning on using onion skins, but I didn’t have enough so I skipped those.
Once your veggies are chopped, add them to a pot and cover them with water. Then you start boiling.


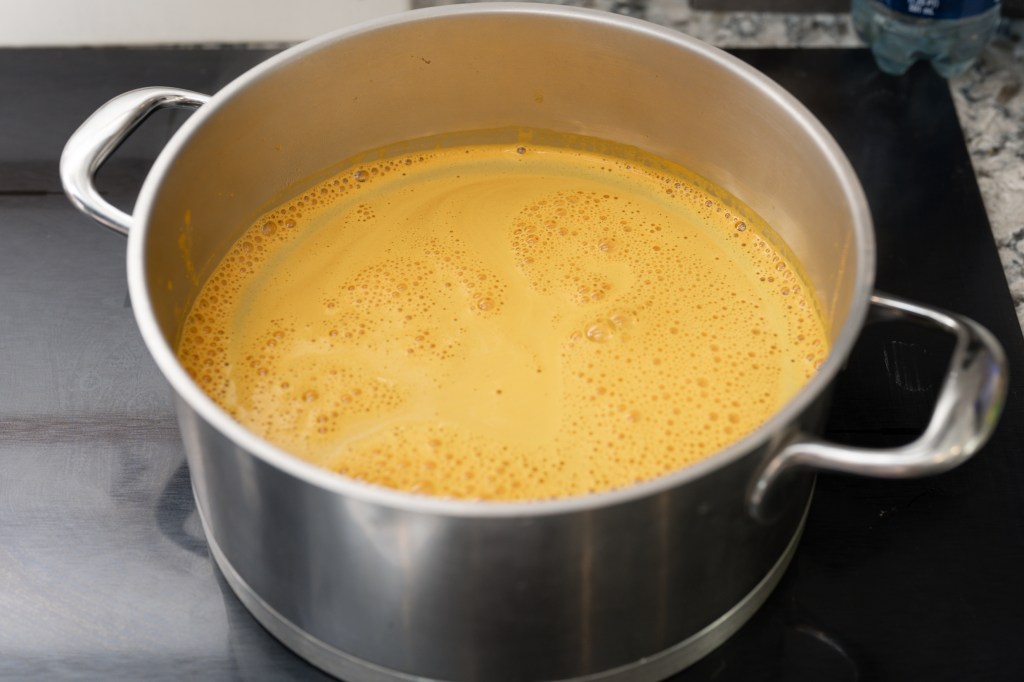
At this point, my house is absolutely stank. It would have been worse if I had added onions. So definitely open a window for the remainder of the dying. After about 30-45 minutes of a soft boil, scoop or strain out the vegetables. With the turmeric there is nothing to strain, so just whisk that in until it mostly dissolves.
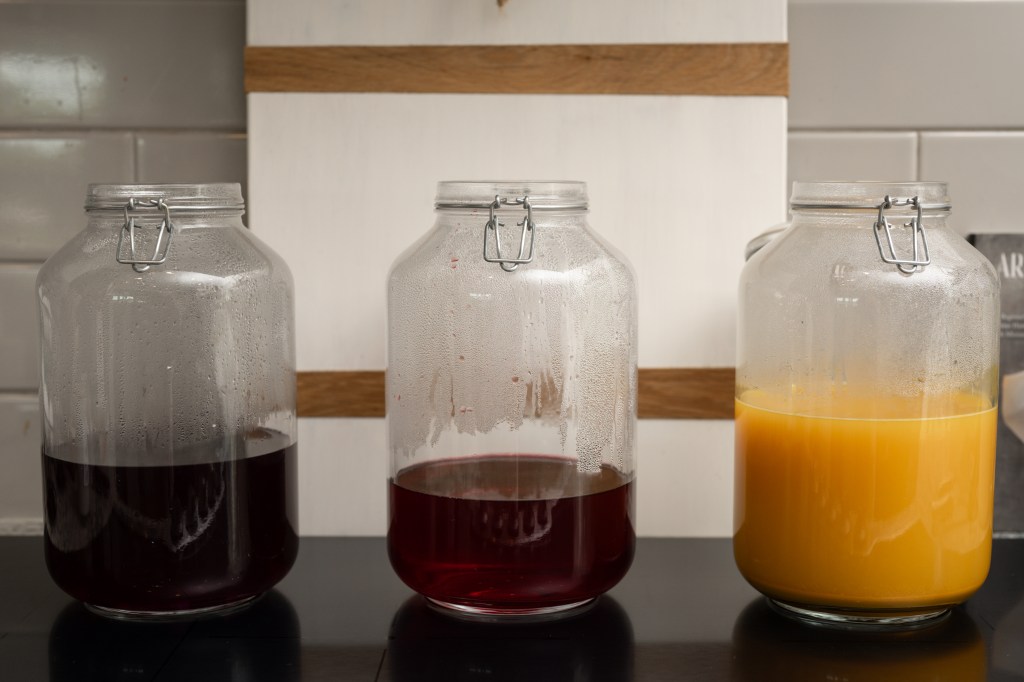
Then you’ll pour your liquids into large jars and slowly lower the eggs into the jars with a slotted spoon.


Then you just set it and forget it. The longer you leave them soaking, the darker the color will be. I love the way they natural dye looks on our eggs. Since our fresh eggs are a mix of cream, white, blues and green, they all look slightly different when dyed. When you’re done soaking them, scoop them back out and let them drip dry on a wire rack before stacking them together in a basket.


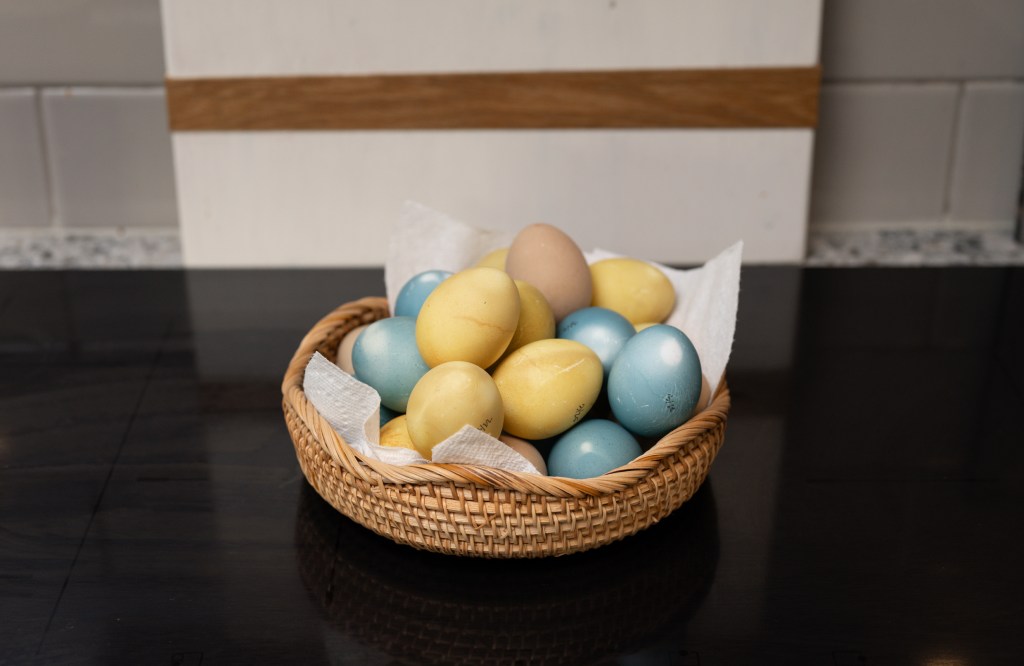
Viola! Naturally dyed, toxic free eggs that you don’t have to feel bad about eating! Next year I’ll try some different vegetables to see what other colors we can get. If you try this, let me know what you use!
